
LEO GlutenVerified™ User Manual

1. Introduction
2. How To Test With LEO
3. How To Read Result Of Test
4. Sampling Procedure
5. Tips For Effective Testing
6. Guidelines To Obtain Max Accuracy
7. Assessing Your Test Results
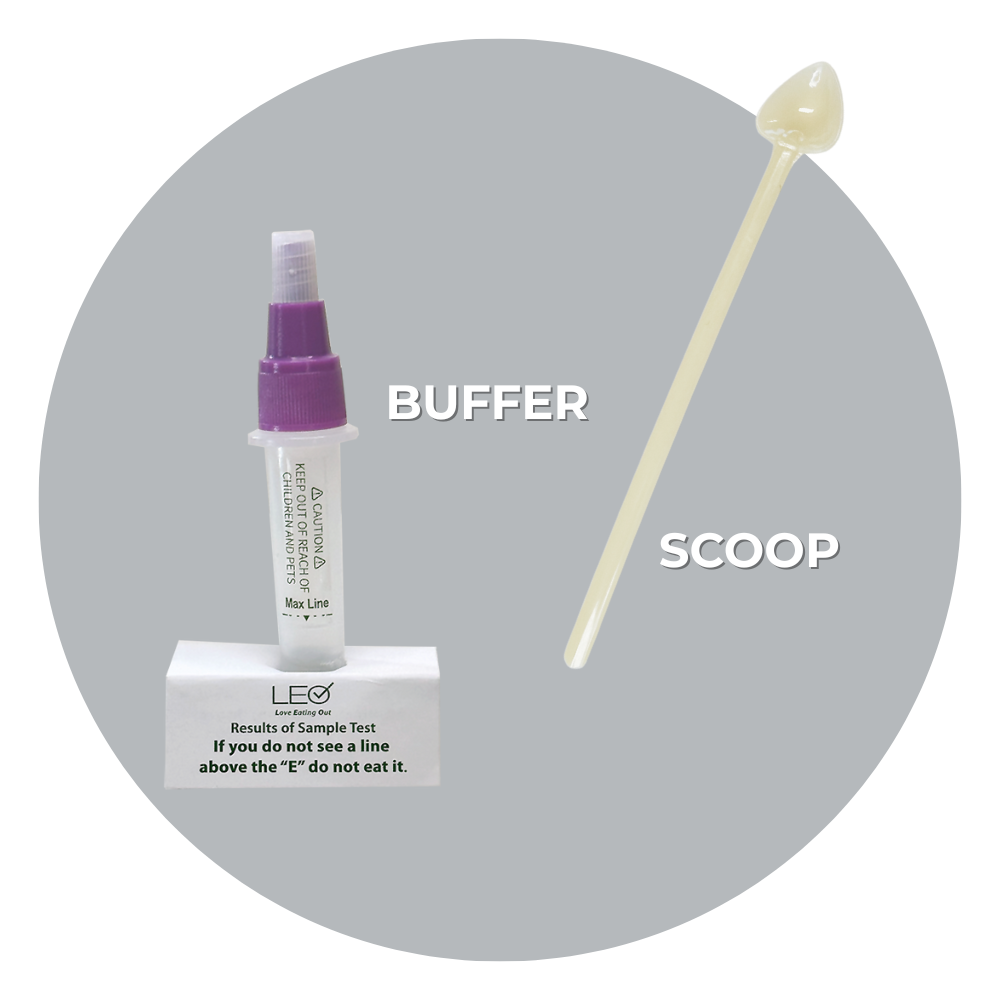
Remove scoop from package. Shake buffer vial to mix it and place in the card holder.
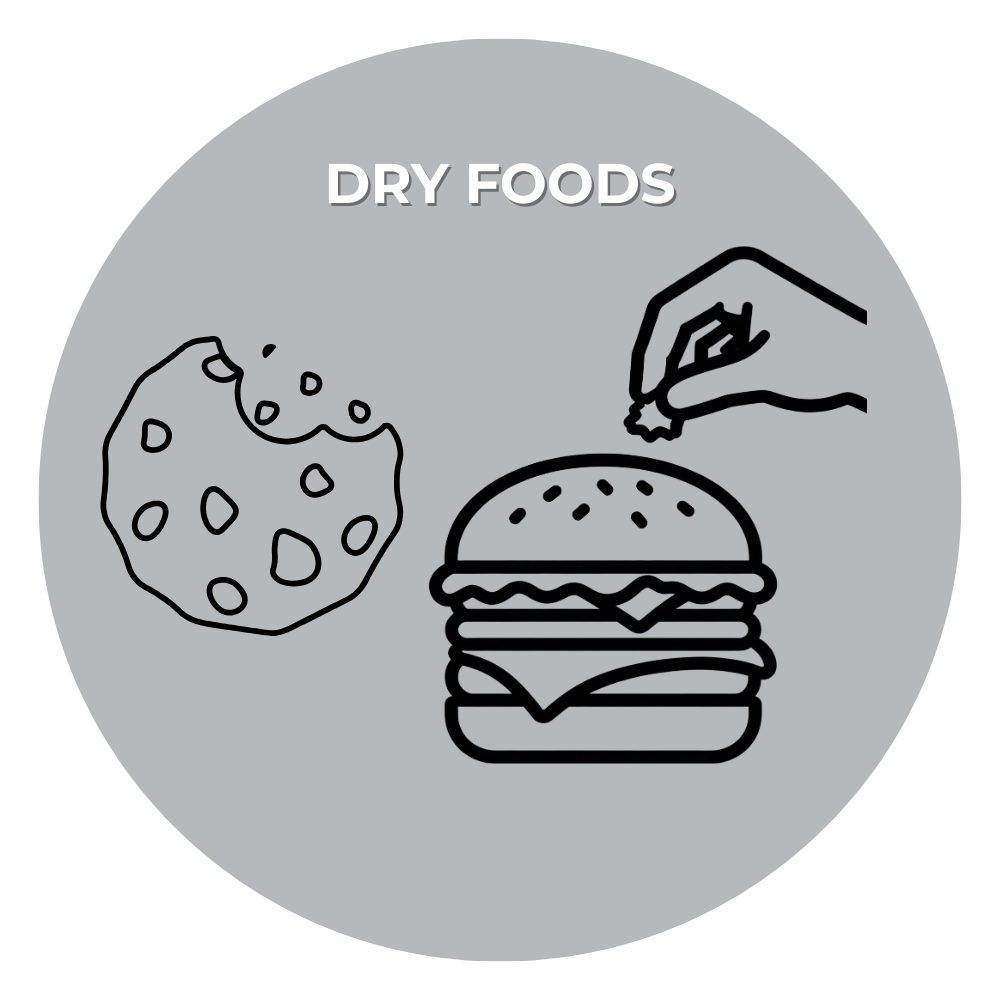
For dry foods, like meat or bread, take 3-5 sesame-sized samples with the scoop or your fingers. Fill to the max line.
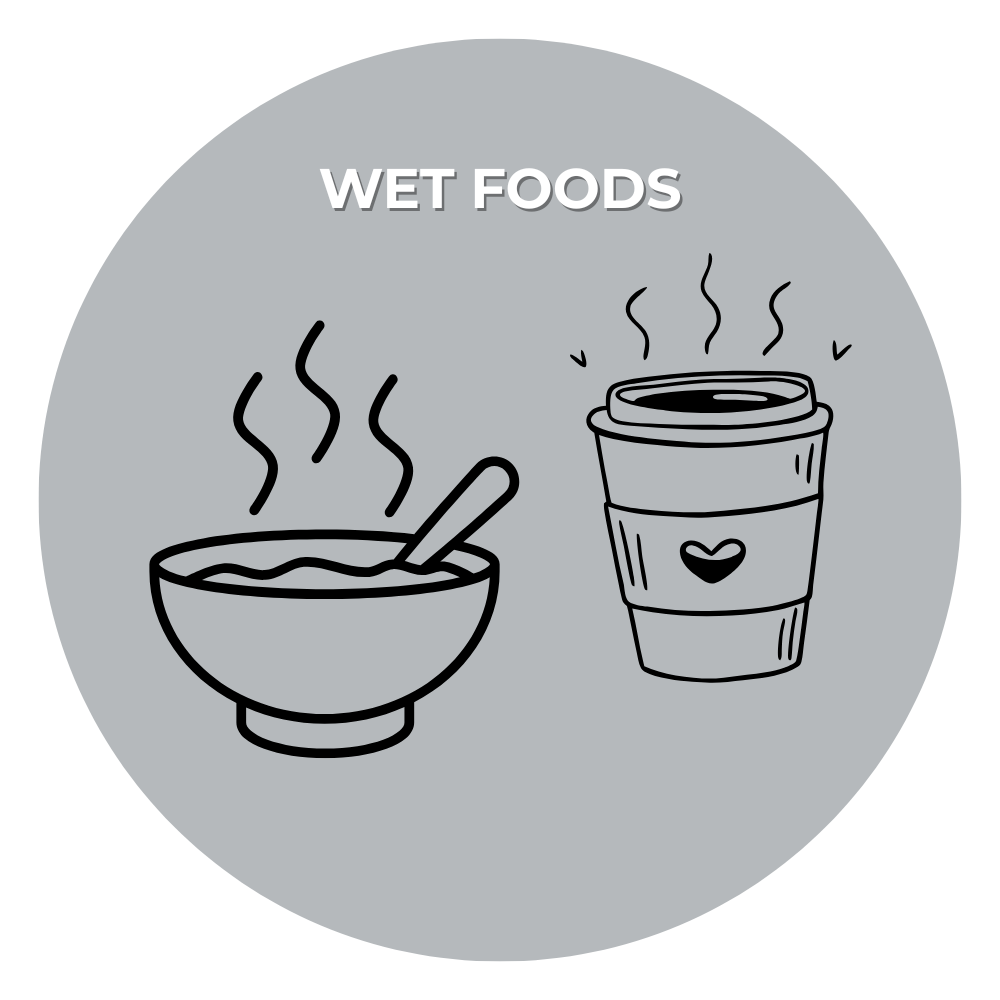
For wets foods, like soup/yogurt, take 2-3 samples with the scoop. Shake well to thin the product.
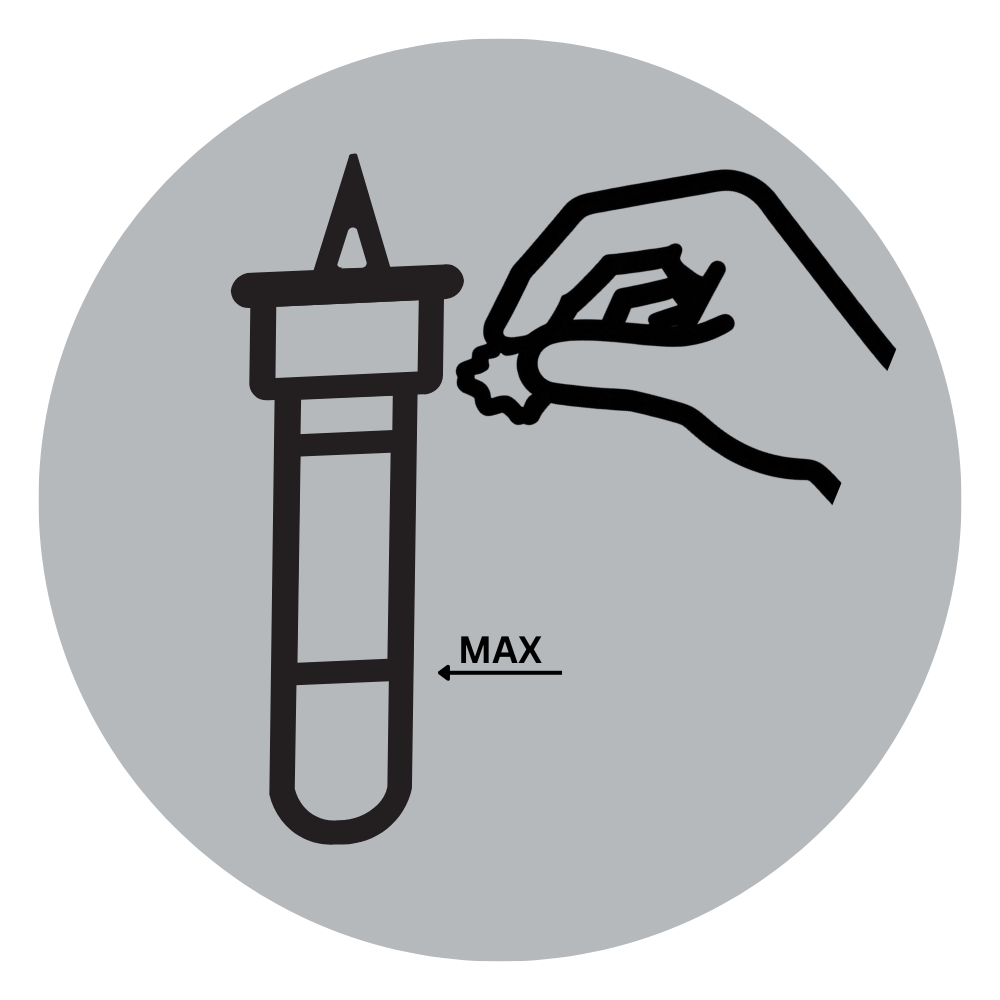
Place sample in the vial. If the food absorbs all of the liquid, add 3 small scoops of water. Do NOT exceed the max line with food. Shake for 5 seconds.
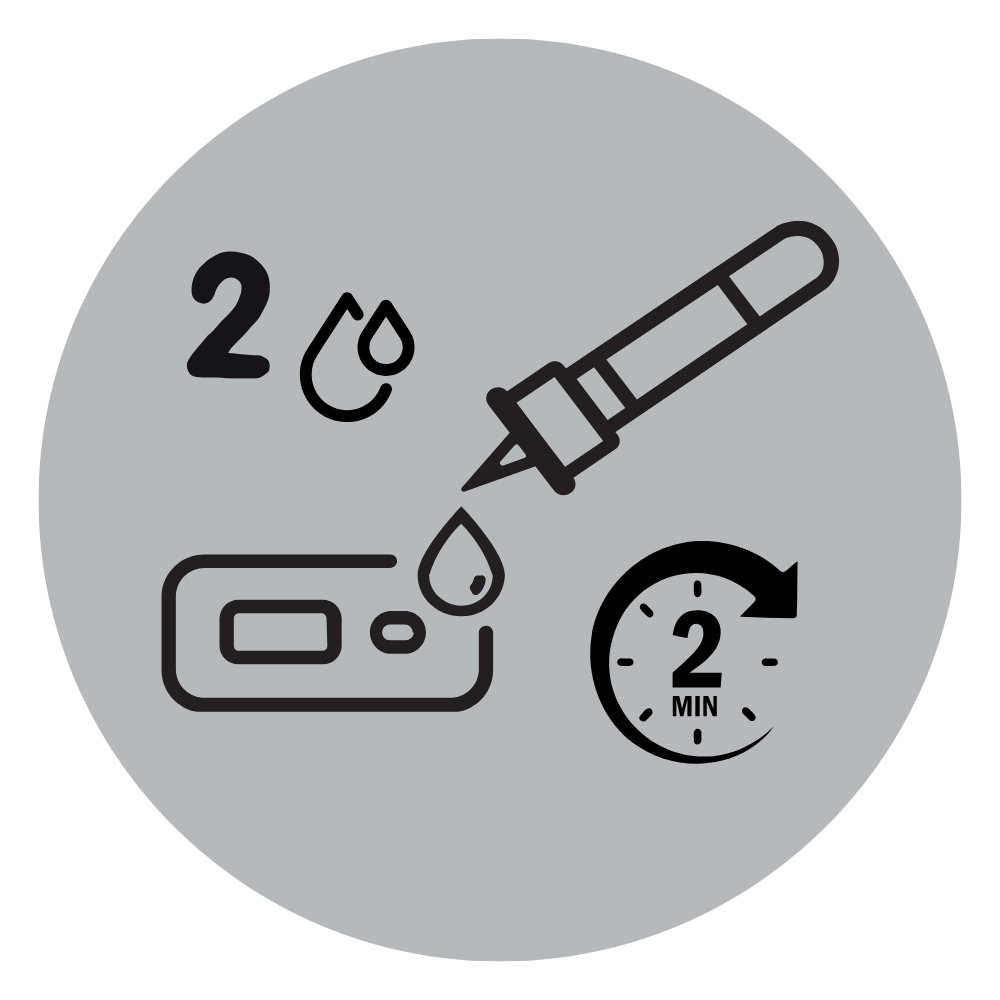
Let the vial sit for 30 seconds once you add your sample. Remove the small white lid and place 2 drops in the “S” sample well. Lay the tester on a flat surface and set a time for 2 minutes.
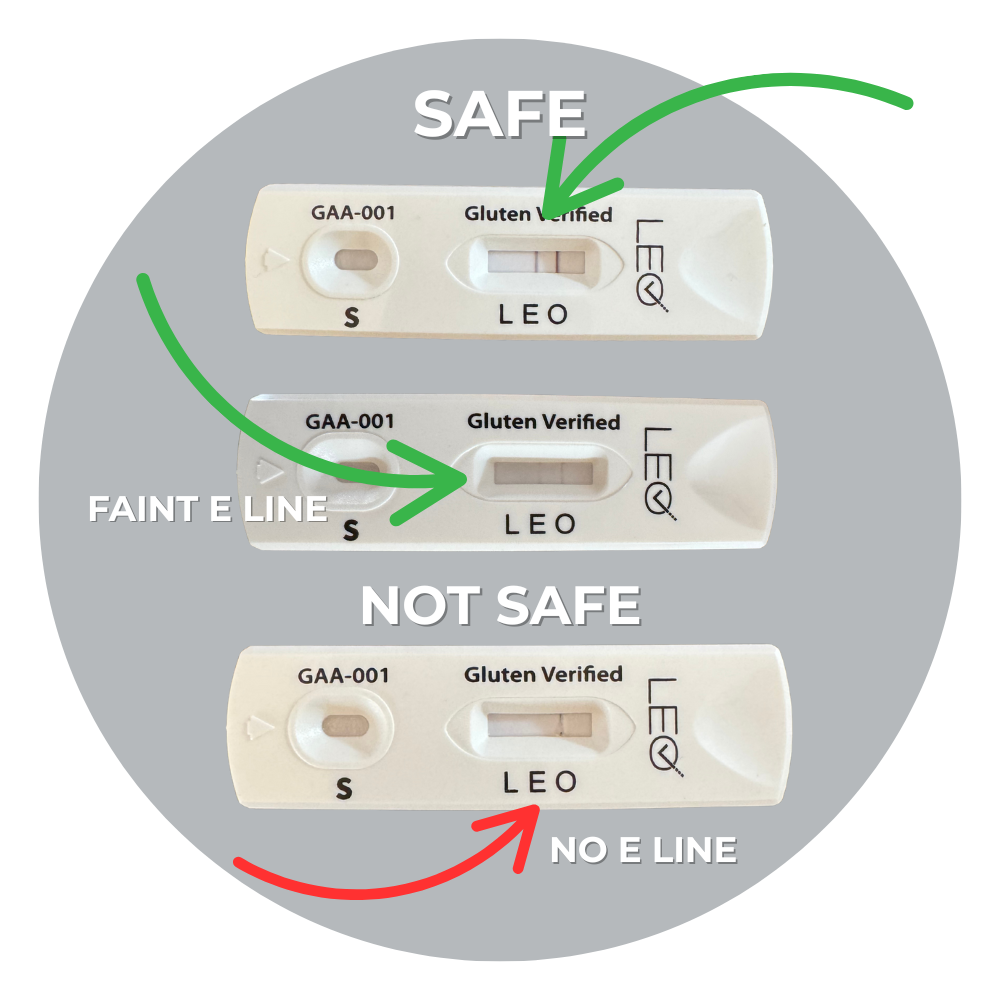
After 2 minutes, if any line appears above the “E”, the sample is under 10 ppm and safe to eat. The O line confirms the test worked properly, however it may take up to 3 minutes.
3. How To Read Test Results
The tester has a window that displays the result. If you see a line above the "E" of LEO then the sample is less than 10 PPM. Please note that the O line is to show that the test worked correctly and the L is for future enhancements.
4. Sampling Procedure for LEO
- Before opening your test kit, we suggest you wash your hands and then open the package.
- Prepare your buffer vial by shaking the vial for 3-5 seconds.
- Remove the large purple lid and place it in the card holder.
- Consider where the gluten may be present such as grill marks, cuts or touching from a shared spatula.
- Lay the gluten sensor chip on a flat surface and do not take out the scoop until ready to test.
It is recommended to sample multiple spots across your plate but not more than 5 spots.
Dry Foods (meat, bread, cracker, cookie):
- Use the provided scoop to take 3–5 sesame seed-sized samples. You may need to use your fingers to pinch a sample.
- Fill to the “max” line on the vial.
- If food absorbs all liquid, add three level scoops of water (using the scoop provided), then replace lid and shake for 5 seconds.
- Let the vial sit in the holder for 30 seconds.
Wet/Moist Foods (soup, mashed potatoes, yogurt, beverage):
- Stir the food.
- Use the scoop to add 2-3 scoops of food into the vial.
- Replace lid and shake vial for 5 seconds. If the solution still looks too thick then add up to 3 level scoops of water to make it thin enough to spread up the test strip.
- Twist the small white cap on the bottle.
- Squeeze 2 drops of the solution into the sample (S) well of the tester.
- Lay the tester on a flat surface.
- Results will be displayed in the testing window in2 minutes.
- It may take up to 3 minutes to see the O line.
5. Tips For Effective Testing
7. Assessing Your Test Results
- Have you eaten there before?
- Do you trust the staff there?
- Ask if the frying oil is used for products that are breaded?
- Are the hash browns cooked in the same area that pancakes are cooked?
- Is it certified gluten-free?
- Is it labeled as gluten-free?
- Have you consumed this item before?
- Check the brand’s website for information on their quality control measures.
- Claims of gluten free could mean up to 20 ppm based on the FDA protocol.
Speak pleasantly when talking with restaurants or packaged food companies to make sure they want to help you and don’t feel they are being accused of anything.
LEO should always be used in conjunction with clear advocacy for gluten-free options and your better judgment.
LEO is intended to give you additional data and level of comfort when eating but is not a guarantee, as it can only provide a result for the sample being tested. It is still your responsibility to clearly communicate your food needs to the waitstaff at restaurants or friends & family preparing gluten-free meals for you, purchase items that are clearly labeled as gluten-free, and advocate for yourself. The decision of whether to consume something or not is your decision.
